VectorGrid is, fundamentally, a puzzle game. There are three targets on the screen which need to be hit by a projectile from each of three launchers, but aiming the projectiles can only be done by steering them using rows of pushers applied to entire rows and columns.
VectorGrid also has several levels of complexity. I recommend that you start playing VectorGrid in single-player mode without either advanced options or the mover enabled. Once you feel good about the basic game, switch on the advanced options. When this gets predictable, enable the mover.
Quick Start
You’re playing single-player, no fancy options. You just want to start. What do you do?
The board will look like this:
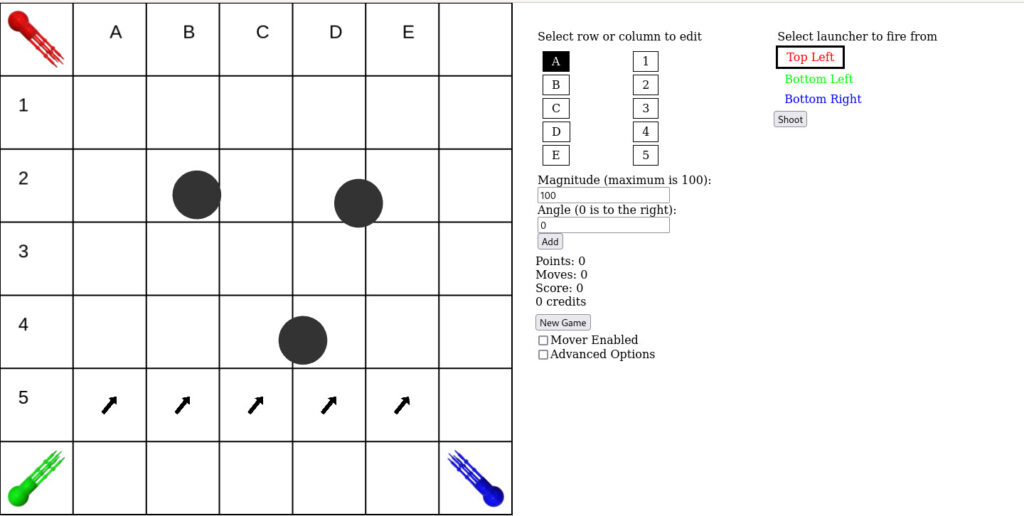
On the left is the playing grid. Three targets (dark circles) are present, and three launchers (red, green, and blue) in the corners. In this diagram, a row of pushers is located in row 5, pointing up at about 45 degrees.
On the right is the control panel. For a quick start we want to focus on the top section of the control panel, shown below.
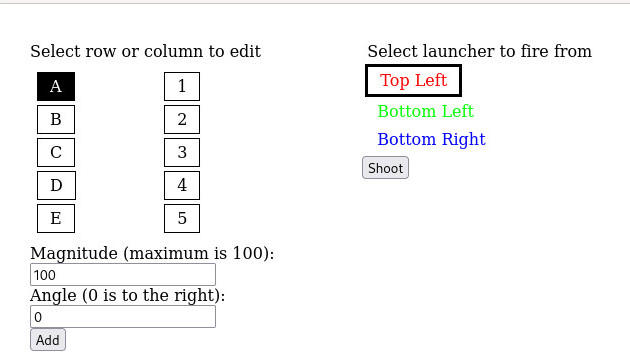
On the right is the launcher control section. Currently, the red launcher (top left) is selected. Clicking “Shoot” will shoot a projectile from this launcher. I strongly recommend beginning any single-player game by shooting a shot from every projectile to see where it goes.
On the left is the pusher control panel. Currently, we are ready to add a column of pushers aimed to the right (0 degrees, degrees are added counter-clockwise, and negative degrees are accepted as valid input) at full strength (100) in column A. Pushers can ONLY be added to an entire row or column, which is where the puzzle nature of the game comes into play, because fixing the projectile path for one launcher may interfere with another.
Without any interference, all the launchers will simply fire straight through the middle of the board. To hit targets that are not in the initial line of fire you will need to add pushers to deflect the projectiles. A pusher pushes anything in its entire square, not just on its arrow icon, and continues to push as long as the projectile is in the square.
The goal is to hit every target with a shot from every launcher. Once hit, a target changes color to indicate what it has been hit by.
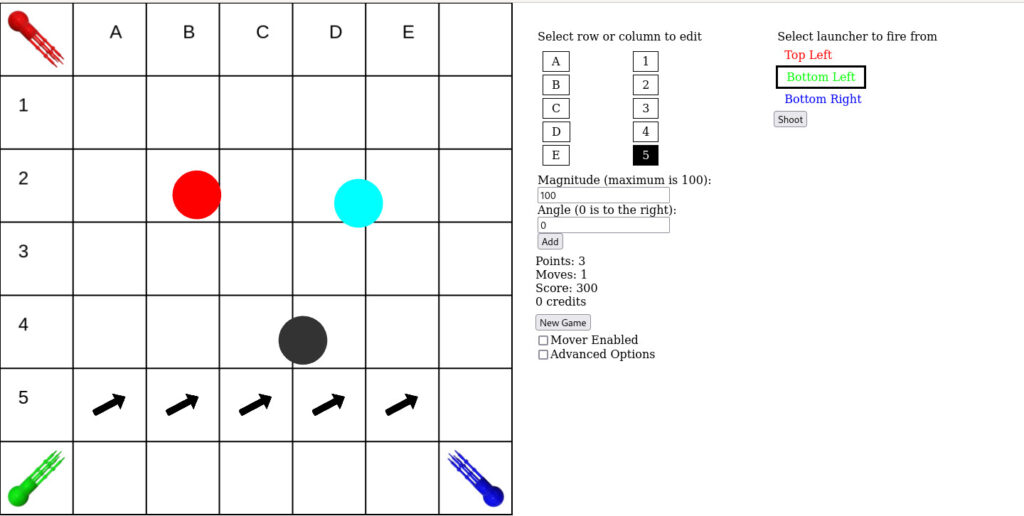
In the image above the upper left target has been hit by the red launcher and the upper right target has been hit by the blue and green launchers (turning it cyan, both blue and green). Hitting this target with the red launcher will explode it. Exploding all three targets with as few pusher-adds as possible is the goal.
Currently, the red launcher fires down the middle of the board, to the left of the intended target. (Hitting the red target again from the red launcher accomplishes nothing.) To deflect a projectile into the target we need to push the projectile right, and to push it hard right we should probably also push it slightly up, slowing it as it crosses the pushers, giving them more time to push it right.
The image below shows a successful shot.
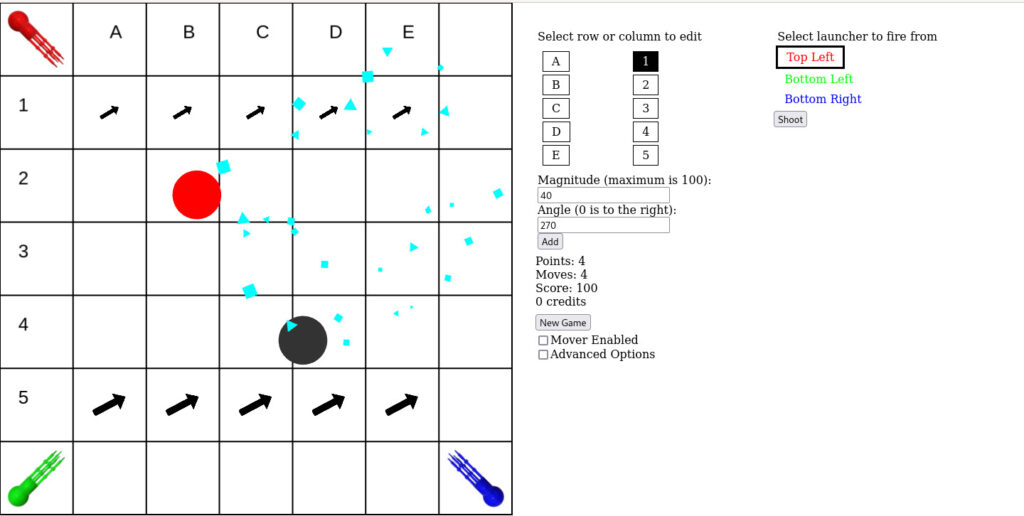
You can see a row of pushers in row 1 that are aimed mostly right but slight up. If you examine the control panel, however, you will see that the last row I added was row 1, aimed down, at 40% power. Why? Well, my initial pusher row, 100% at 45 degrees, actually stopped the projectile’s downwards motion and then tossed it up and off the board, so I used a weaker downward pusher to reduce the strength of the original pushers. Pushers always add together, using basic vector addition rules.
And that’s what you need to know to start!
What About Two-Player?
Assuming you’ve read the single-player quick start two player has only two more rules. First, there are rounds that players alternate between. Most rounds have two moves (a move is either shooting or adding a vector) but the first one only allows a single vector add (otherwise player one has too great an advantage). In the image below you can see in the control panel that it is Player 1’s turn (Player 1’s information is in bold), which color each player controls, and that Player 1 is out of moves. Player 1 should click “End Round” to pass control to Player 2.
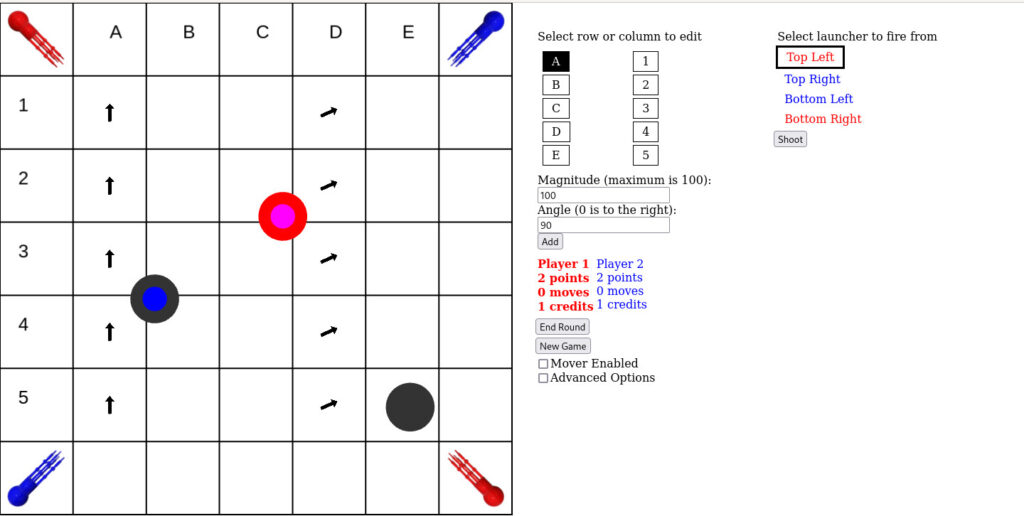
Second, each player now controls two launchers of the same color, and it’s no longer necessary to hit a target from both launchers. Instead, a target will explode from any three shots from the same player. Each time a player hits a target they get a point. If you can explode the target before your opponent gets hits on it you can deny them points.
In the image above you can see how the color-coding works. Targets are colored from the inside out. The leftmost target has been hit once by a blue projectile. If it were hit again it would turn solid blue. If it were hit a third time it would explode. The topmost target has been hit twice by red projectiles, and once by blue, making it red all the way through, but red + blue (magenta) in the middle.
Advanced Options
Advanced options make use of credits. How do you get credits?
Single Player
1) Hit the new “Trigger Disaster for Credit” button. Something bad will happen and you’ll get credits. The worse the disaster is the more credits you will get.
2) Explode a credit mine. These blue mines with a dollar sign on them explode whenever a projectile gets close. They are dropped randomly on the board when a target explodes.

Two Player
1) Skip a move for a credit.
2) Hit a target.
There are now several new projectile options available. Each of these has a credit cost written as (number C) after the projectile name. In single player mode rockets are free until you add special warheads, but in two player mode all rockets have a cost.
Shotgun
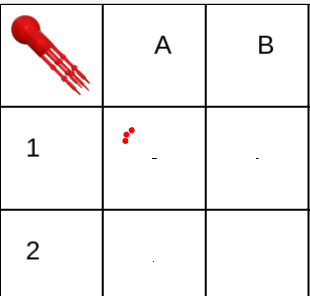
The shotgun throws a cluster of three projectiles at one time, at slightly randomized angles. This can be useful for hitting a target that is slightly off the main path. In two-player it can potentially one-shot a target
Blaster Bolt
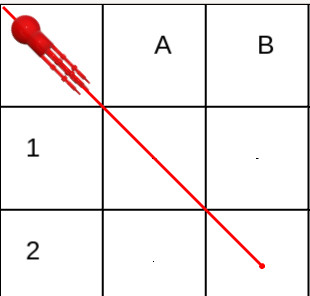
The blaster bolt fires a laser-like bolt that moves straight through the first square and a half without any deflection before becoming an ordinary projectile with the velocity a projectile would normally acquire from the launcher. This can be used to avoid unfortunate pushers in the first square.
Piercing Round
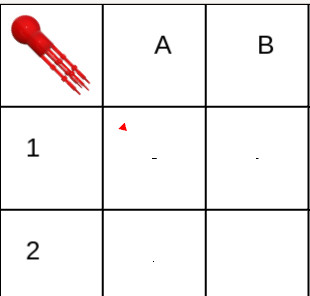
Piercing rounds are like normal shots except that they are triangles and they do not stop when they hit a target. This means that if two targets are in a line they can both be hit with one round.
Item Deployer
Item deployers are rounds that explode when you click “Detonate” (which replaces “Shoot”) and drop an item where they are. Items can be found under “Warhead Options” and are the entries other than double power and shrapnel. Items are described further below the Rockets section.
Rockets
Rockets propel themselves forward, constantly accelerating in their original direction of travel. This makes them hard to deflect, which can be both good and bad. They also explode when they get into proximity of the target. You can also explode them yourself by hitting the “Shoot” button again, which will become a “Detonate” button once you launch a rocket. This is not very useful for a normal rocket, but once a rocket is loaded with a special warhead this can be very useful. Most of the special options only apply to special warheads, but the Double Power option applies to regular, explosive warheads and doubles the size of the explosion.
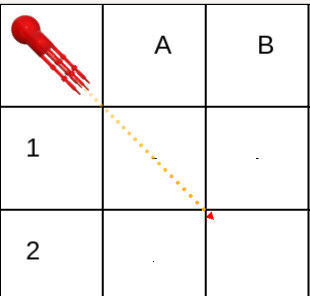
Special warheads include the shrapnel warhead and a variety of trap warheads. Shrapnel warheads spray projectiles when they explode, effectively a rocket that triggers Shotgun when it explodes (although the angles of the projectiles are more extreme in Shrapnel, and their number can be increased with Double Power).
Traps/Items
Traps in VectorGrid refer to any stationary map element that interferes with projectiles. Most traps go away after a certain number of moves (the number depends on how they were triggered) but mines stay on the board until they explode (which throws regular projectiles off course and detonates rockets). Mines are also not something you can use as a projectile, and will only appear as part of disasters on the board. Projectiles armed with traps can be detonated to lay the trap, and the trap will stick around longer if Double Trap Time is applied. Traps can also be cleared with the Trap Clear warhead, which has a large explosion that both damages targets and removes traps.
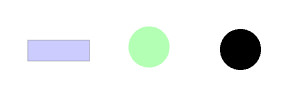

Reflectors
Reflectors are what they sound like. They are blueish squares that bounce projectiles off of themselves. They are larger in one direction than the other, and you can select whether they will be longer horizontally or longer vertically.
Rabbit Patch
The Rabbit Patch option applies a speed doubler. These are translucent green circles that double the velocity of any projectile that crosses them. Want a double-power launcher? Explode a Rabbit Patch rocket right off the end of the launcher.
Blow a Hole in the World
Holes are only available as a rocket round in two player mode, because they serve only to make a mess. They make a hole in the board that any projectile will fall through, never to be seen again.
Non-projectiles
There are also a set of buttons that have credit costs that can be used. These do NOT count as moves in two-player, and so a player can apply one while also using two moves. The ones marked “One Use” can only be used once per game.
Feeling Flushed applies a giant whirlpool/toilet bowl effect to the whole board. You pick the direction. This adds to the existing pushers, so don’t expect it to override some strength 800 monstrosity you’ve saddled yourself with.
Opposite Day temporarily flips the sign of all existing pushers on the board. This can be useful but is often very disconcerting when the effects wear off, especially because all pushers put down while Opposite Day was in effect stay aimed in their original direction.
Two player games can also make use of Mirage. Mirage is cheap because it’s more mean than it is useful, although under certain circumstances it’s clearly useful. It clones an existing target and loads the clone with traps. Half the time the “new” target that appears is the clone, but half the time the clone takes the place of the old target and the “new” target is the old one in a new place.
Mass Effect adds a slight “gravitational” effect, where all targets end up with weak pushers aimed at them.
The Mover
The Mover is a problem. And it moves, of course. Because this is not a game of speed and reflexes it moves based on your own moves. It displays its own information just under the “Shoot” button. Adding pushers reduces its counter by 2, shooting reduces it by 1. Once the counter reaches zero the Mover (a gray circle about the size of a target, with red or blue outline detailing and an image in the middle) teleports itself to the marker (the orange circle). A new marker appears, and so the Mover is, in this sense, entirely predictable.
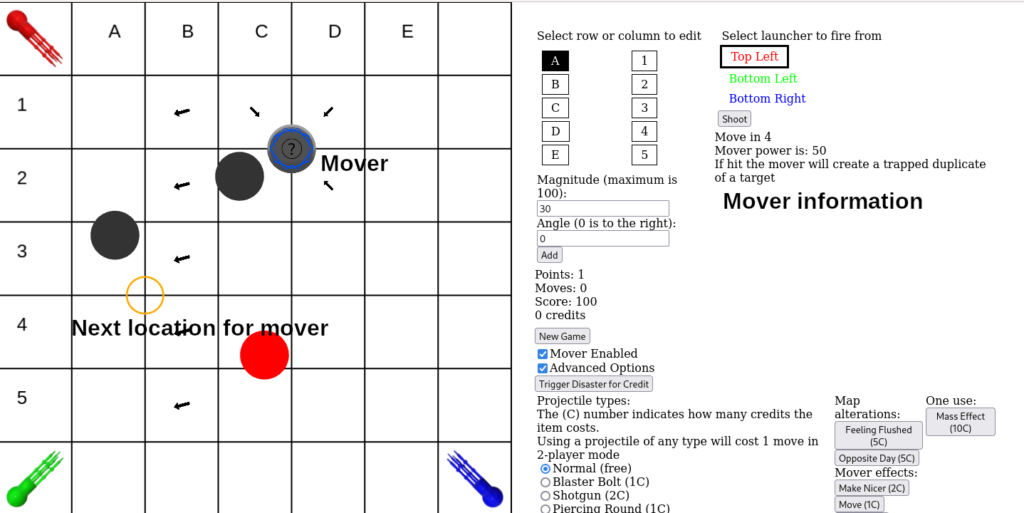
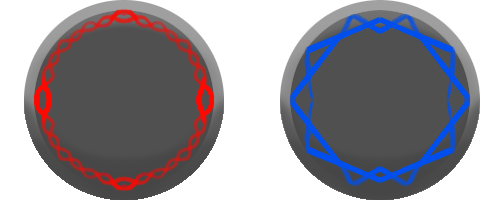
Movers have two effects. One is their ability to “warp” the map. Push-type movers create pushers in each of the four squares they touch that point away from them, while pull-type create pushers pointing towards themselves. These pushers are not permanently attached to these squares. When the mover moves the pushers also vanish and appear at the new location. Push-type movers have a red design around the outside and pull-type have a blue design.
The Mover’s second effect is its effect when it is shot. It blocks shots, which can be annoying by itself, but it also always has some effect when hit. This effect is listed in the mover information. In the image of a game with a mover above the mover will create a trapped duplicate target when hit. This is also shown by a unique icon on the mover, so after some time you can recognize a mover’s effect by its image.
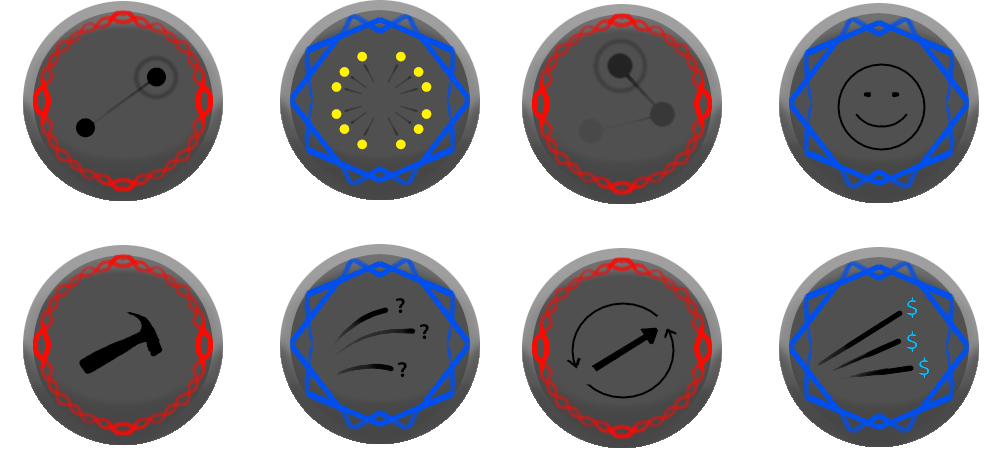
Bottom row, left to right: the mover will repair a random target, the mover will throw random unpleasant traps, the mover will add a random row or column of pushers, and the mover will shoot out credit mines.
Some mover functions are good (like ones that produce credit mines). Some are neutral, like the ones that change how often the mover moves. Others are bad, like the ones that repair targets or drop traps. However, every time the mover is hit or moves it changes its effect. For this reason it is a bad idea to fire at the mover multiple times because you see a good effect. The first projectile will hit it, getting the good effect, and the following projectiles will trigger random effects as the effects change!
Basic Mover Effects
Attitude changes
You may see effects called “make mover nicer” or “make mover meaner”. The “attitude” of the mover is its odds of generating good, neutral, or bad effects. At higher difficulties the mover starts meaner. Attitude changes add together.
Repair
If the mover repairs a target the target acts as if it was hit one less time. Which launcher it removes the hit from is random, so this can be a real issue. However, you do keep the point for hitting the target, so as long as you can still repeat the shot you may be able to get a higher score this way.
Move faster/slower
The mover may move as soon as it is hit, or add five to its countdown when hit. These are once-off effects. It may also alter its basic countdown. Movers start by counting down from five before moving. However, on-hit effects may permanently add or subtract from this number.
Power
A mover’s power is the magnitude of the pushers it create. You will see options to both increase (double) or decrease (halve) that power. These stack together.
Add pushers
The mover can also add a random row or column of randomly powered and randomly aimed pushers.
Mirage
The mover can duplicate the mirage effect.
Death
The mover can be made to vanish if you hit it when it has this effect. However, in its death it will take a terrible vengeance on the board.
Throw/Shoot/Shield
The mover can also deploy any trap as well as credit mines. The method of deployment can be throw, shoot, or shield. Throw is symbolized as slightly-arcing lines in the icon. The mover creates fragments with random vectors and timers. These move across the map being pushed by pushers until their timer runs out and then they drop their items.
Shoot is symbolized by straight lines. The move blasts out several lines which place items where they end. They are completely unaffected by pushers.
Shield is symbolized by a circle of lines radiating out from the center. This is exactly how a mover creates a shield: eight lines like those in shoot appear, even spaced around the mover, and drop items at a set (close) distance.
